Table of Contents
Getting Started with Comply+
Configure your account and walk through FINTRAC reporting—from first login to confirmed receipt.
Create Your Account & Sign In
Modes: Demo & Production
FWR Systems
Quick Start
- 1Choose a mode (Demo for mock submissions; Production for actual FINTRAC filings).
- 2Configure Company Settings (activity sector, static 24-hour period, FINTRAC Org/API data, KYC provider data).
- 3Add or import Customers.
- 4Add Locations with exact FINTRAC Location IDs from FWR.
- 5Create a one-off report or use Bulk Transaction Import.
- 6Review drafts and Submit; track results in Submission History.
Dashboard
What you see: Total Customers, Active Locations, Reports Submitted, Pending Reports, and quick actions.
Why it matters: Your command center, where you can view your company's compliance metrics and take action.
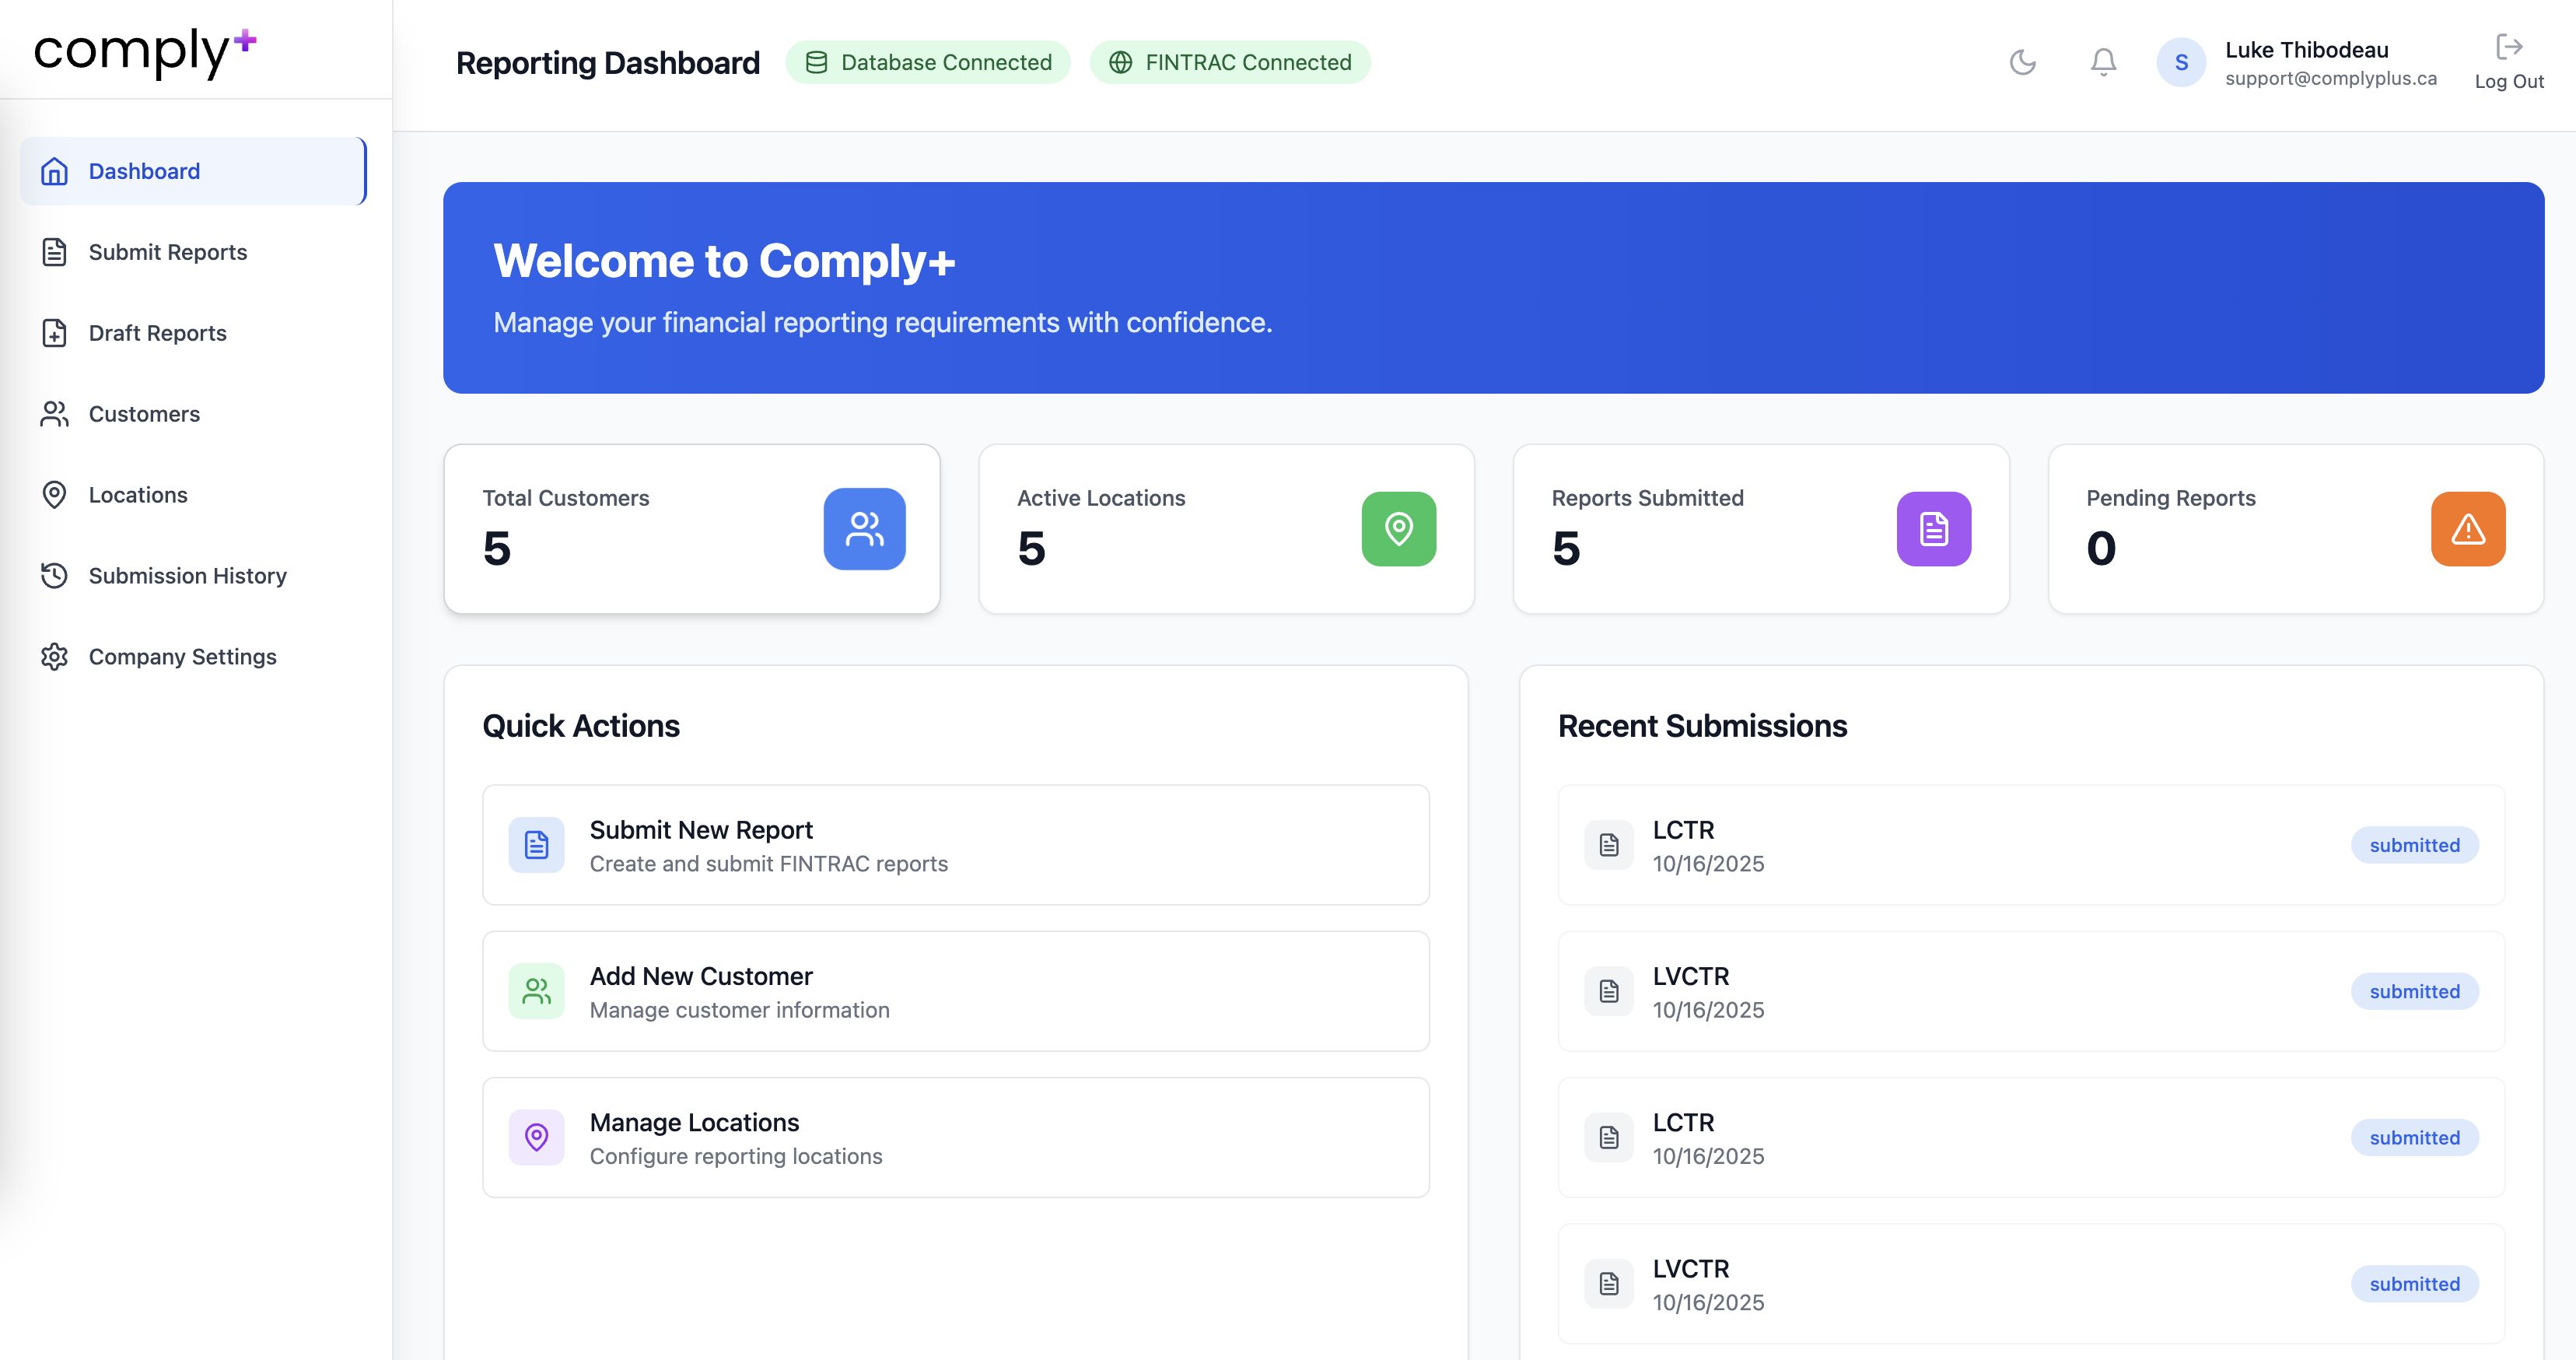
Figure 1: Dashboard Overview
Company Settings
Purpose of Company Settings
Store all company-specific data used during reporting:
- Activity Sector
- Static 24-hour aggregation window
- FINTRAC Organization data (Organization Number, Reporting Entity Contact ID)
- FINTRAC API credentials (Client ID, Client Secret; TEST or PRODUCTION)
- KYC provider configuration (Sumsub and/or Persona; more coming soon)
FINTRAC FWR access and API credentials required for Production mode submissions
Customers
Create customers referenced in reports.
Add methods: manual, CSV upload, or Sumsub/Persona integrations for automatic customer inclusion.
Important: The Bulk Uploader matches transactions to customers by either the Customer's ID or Phone Number.
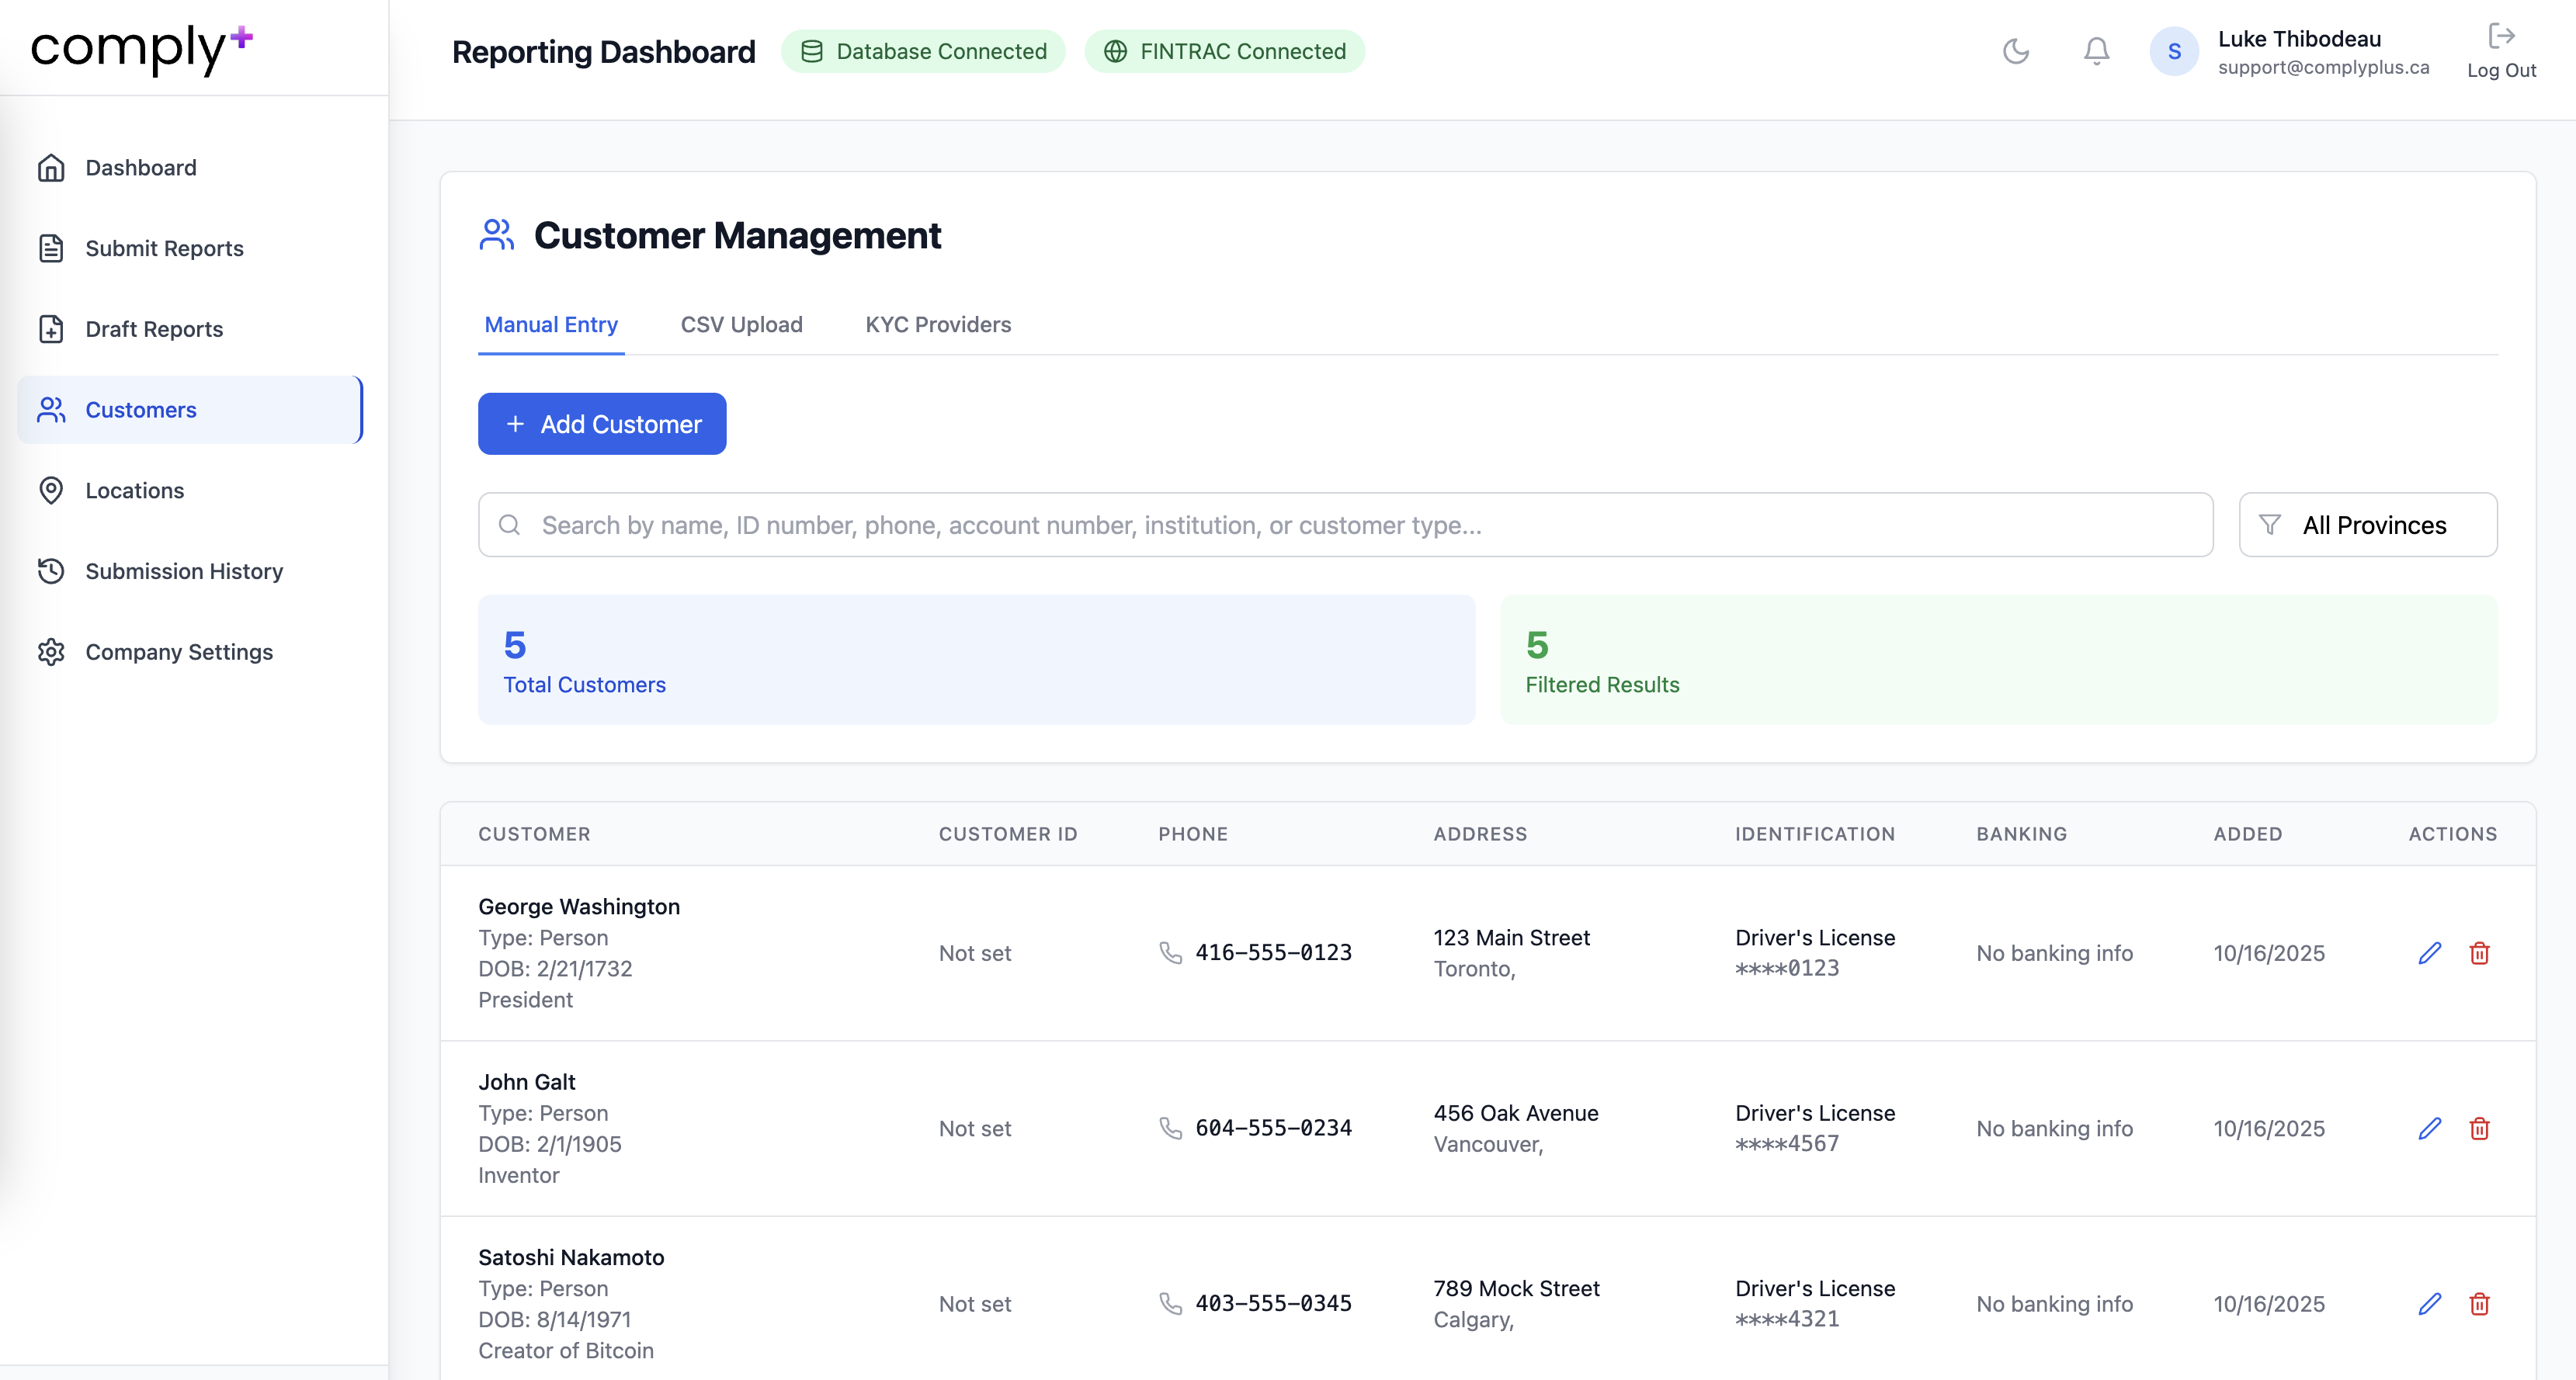
Figure 3: Customer Management
Locations
Each location must include the exact FINTRAC Location ID from FWR.
Add methods: manual add, or CSV upload.
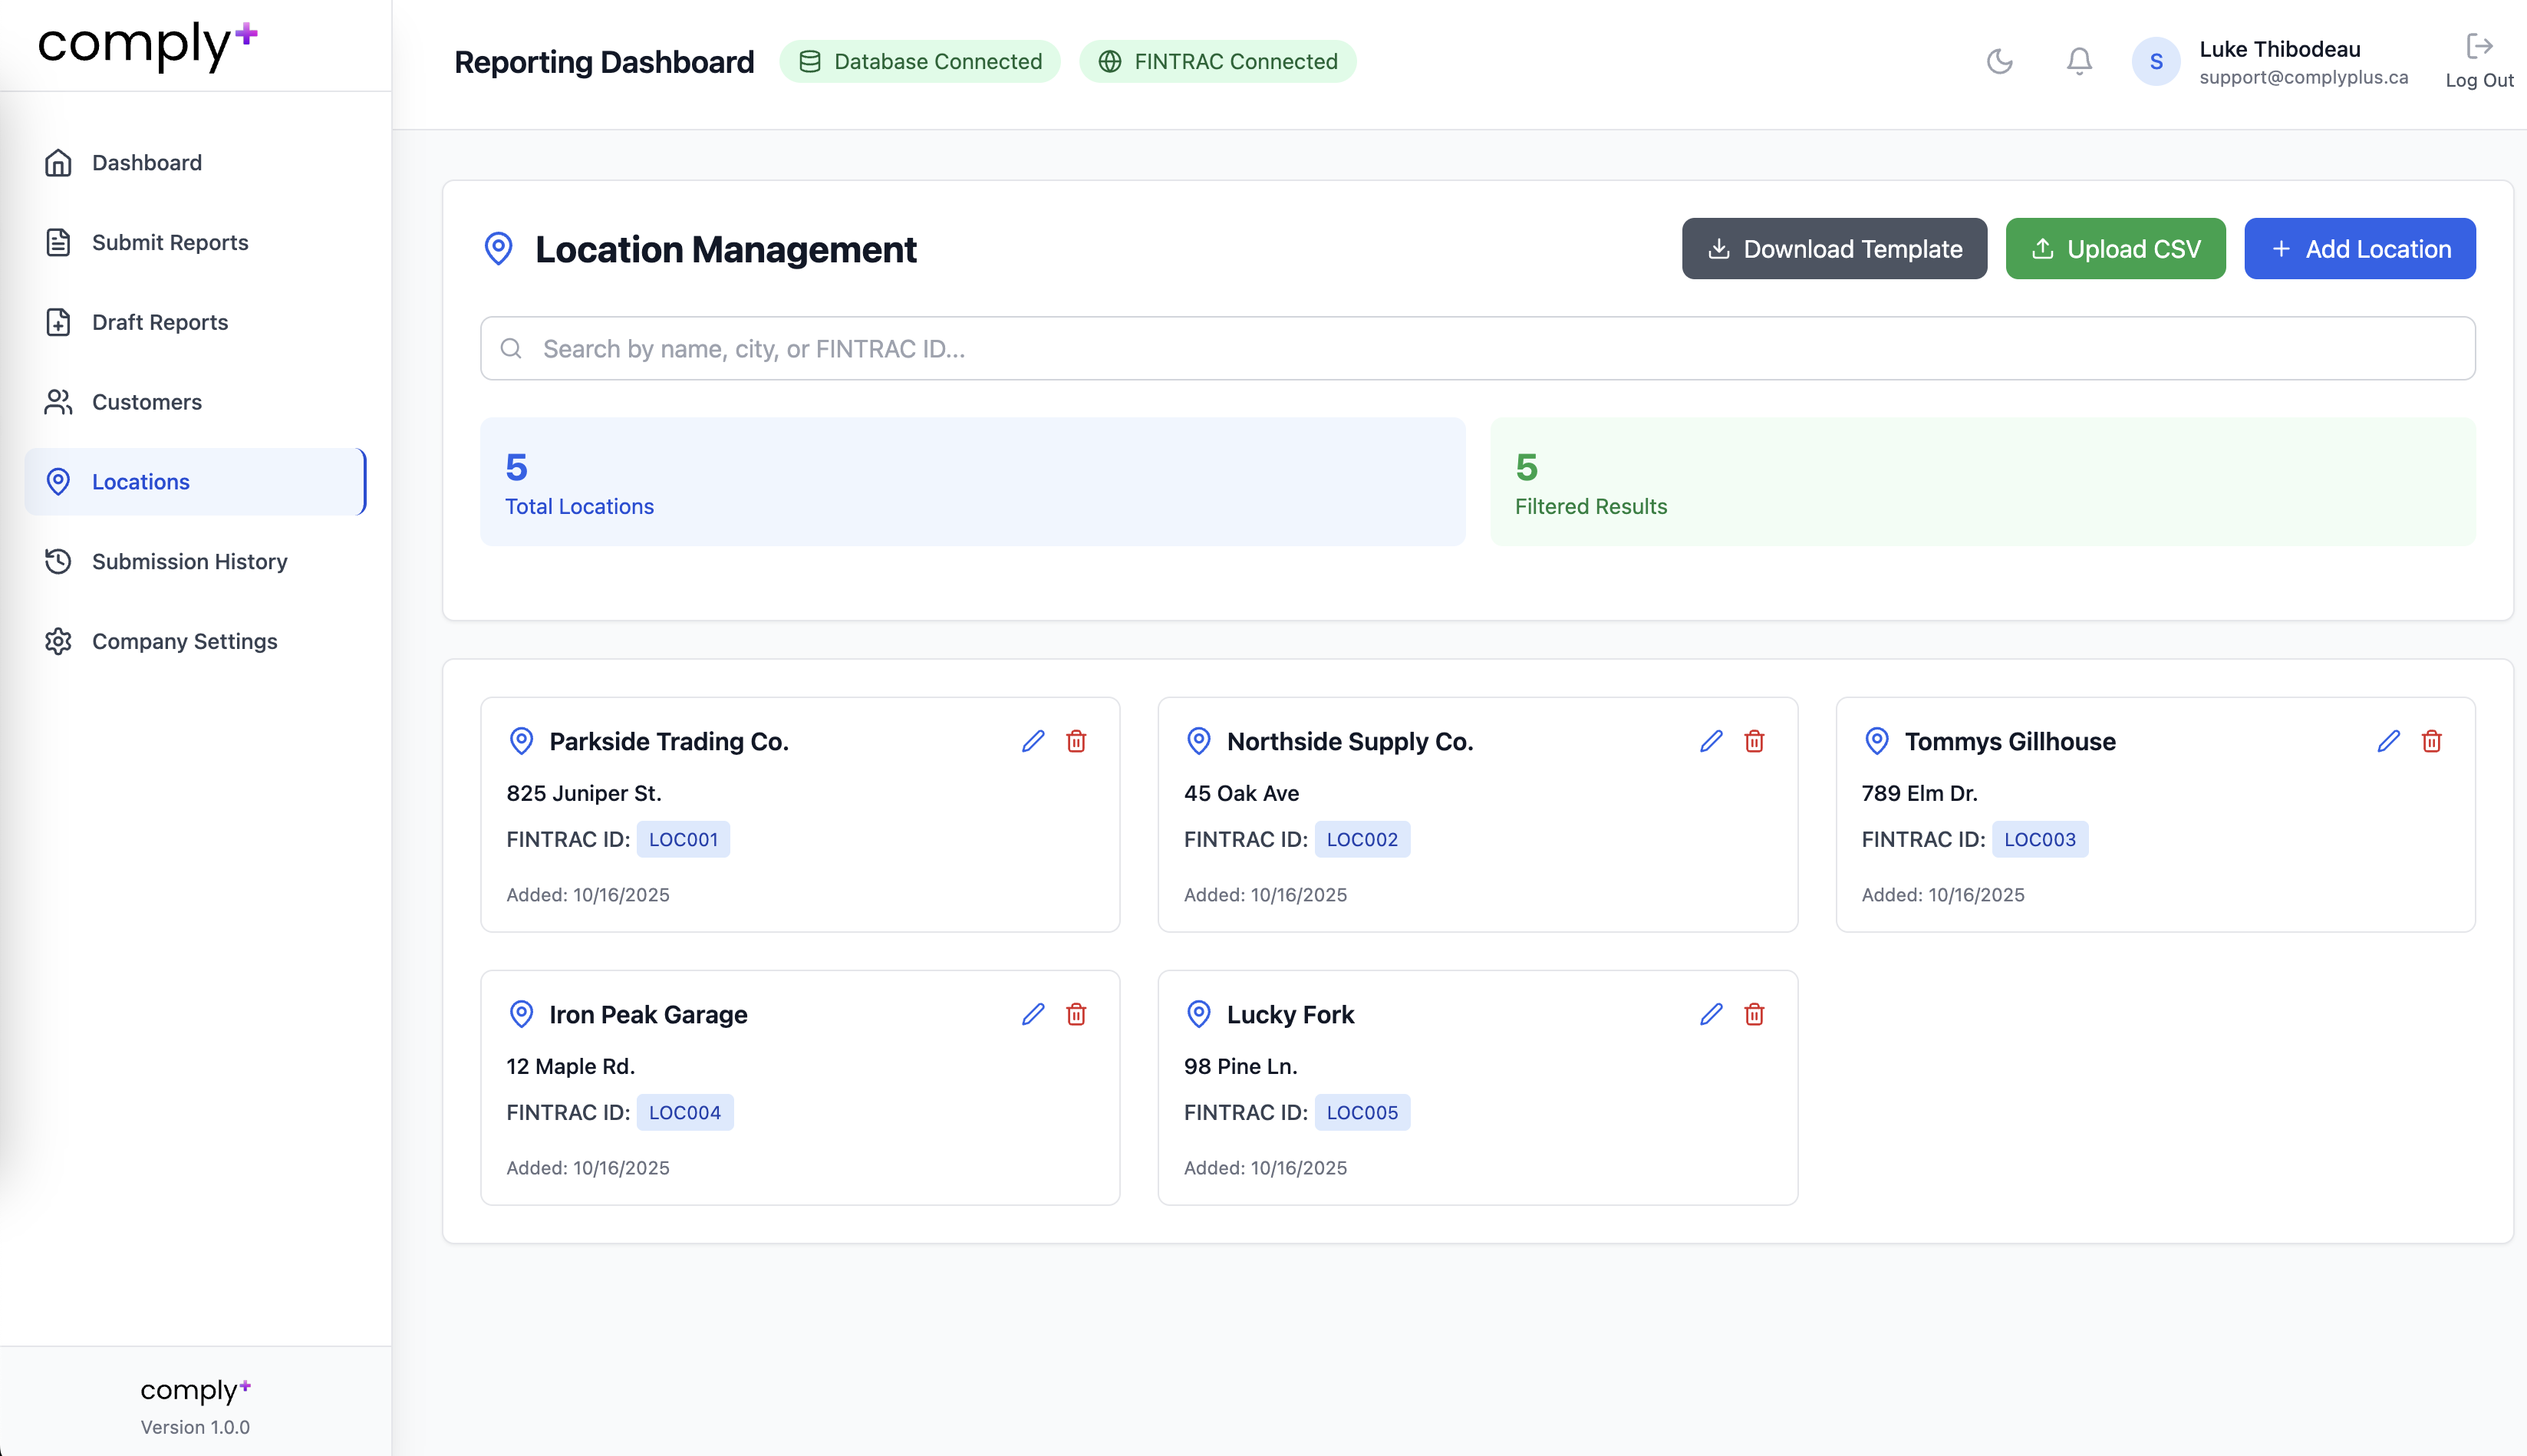
Figure 4: Location Management
Submit Reports
Choose a report type:
- LCTR — Large Cash Transaction Report
- LVCTR — Large Virtual Currency Transaction Report
- STR — Suspicious Transaction Report
- EFTR — Electronic Funds Transfer Report
- CDR — Casino Disbursement Report
- LPEPR — Listed Person/Entity Property Report (coming soon)
Demo Mode: Full flow is available for testing, but no data is sent to FINTRAC.
Production Mode: Use TEST API credentials to submit to TEST FWR. Use PRODUCTION API credentials to submit to PRODUCTION FWR for live filings.
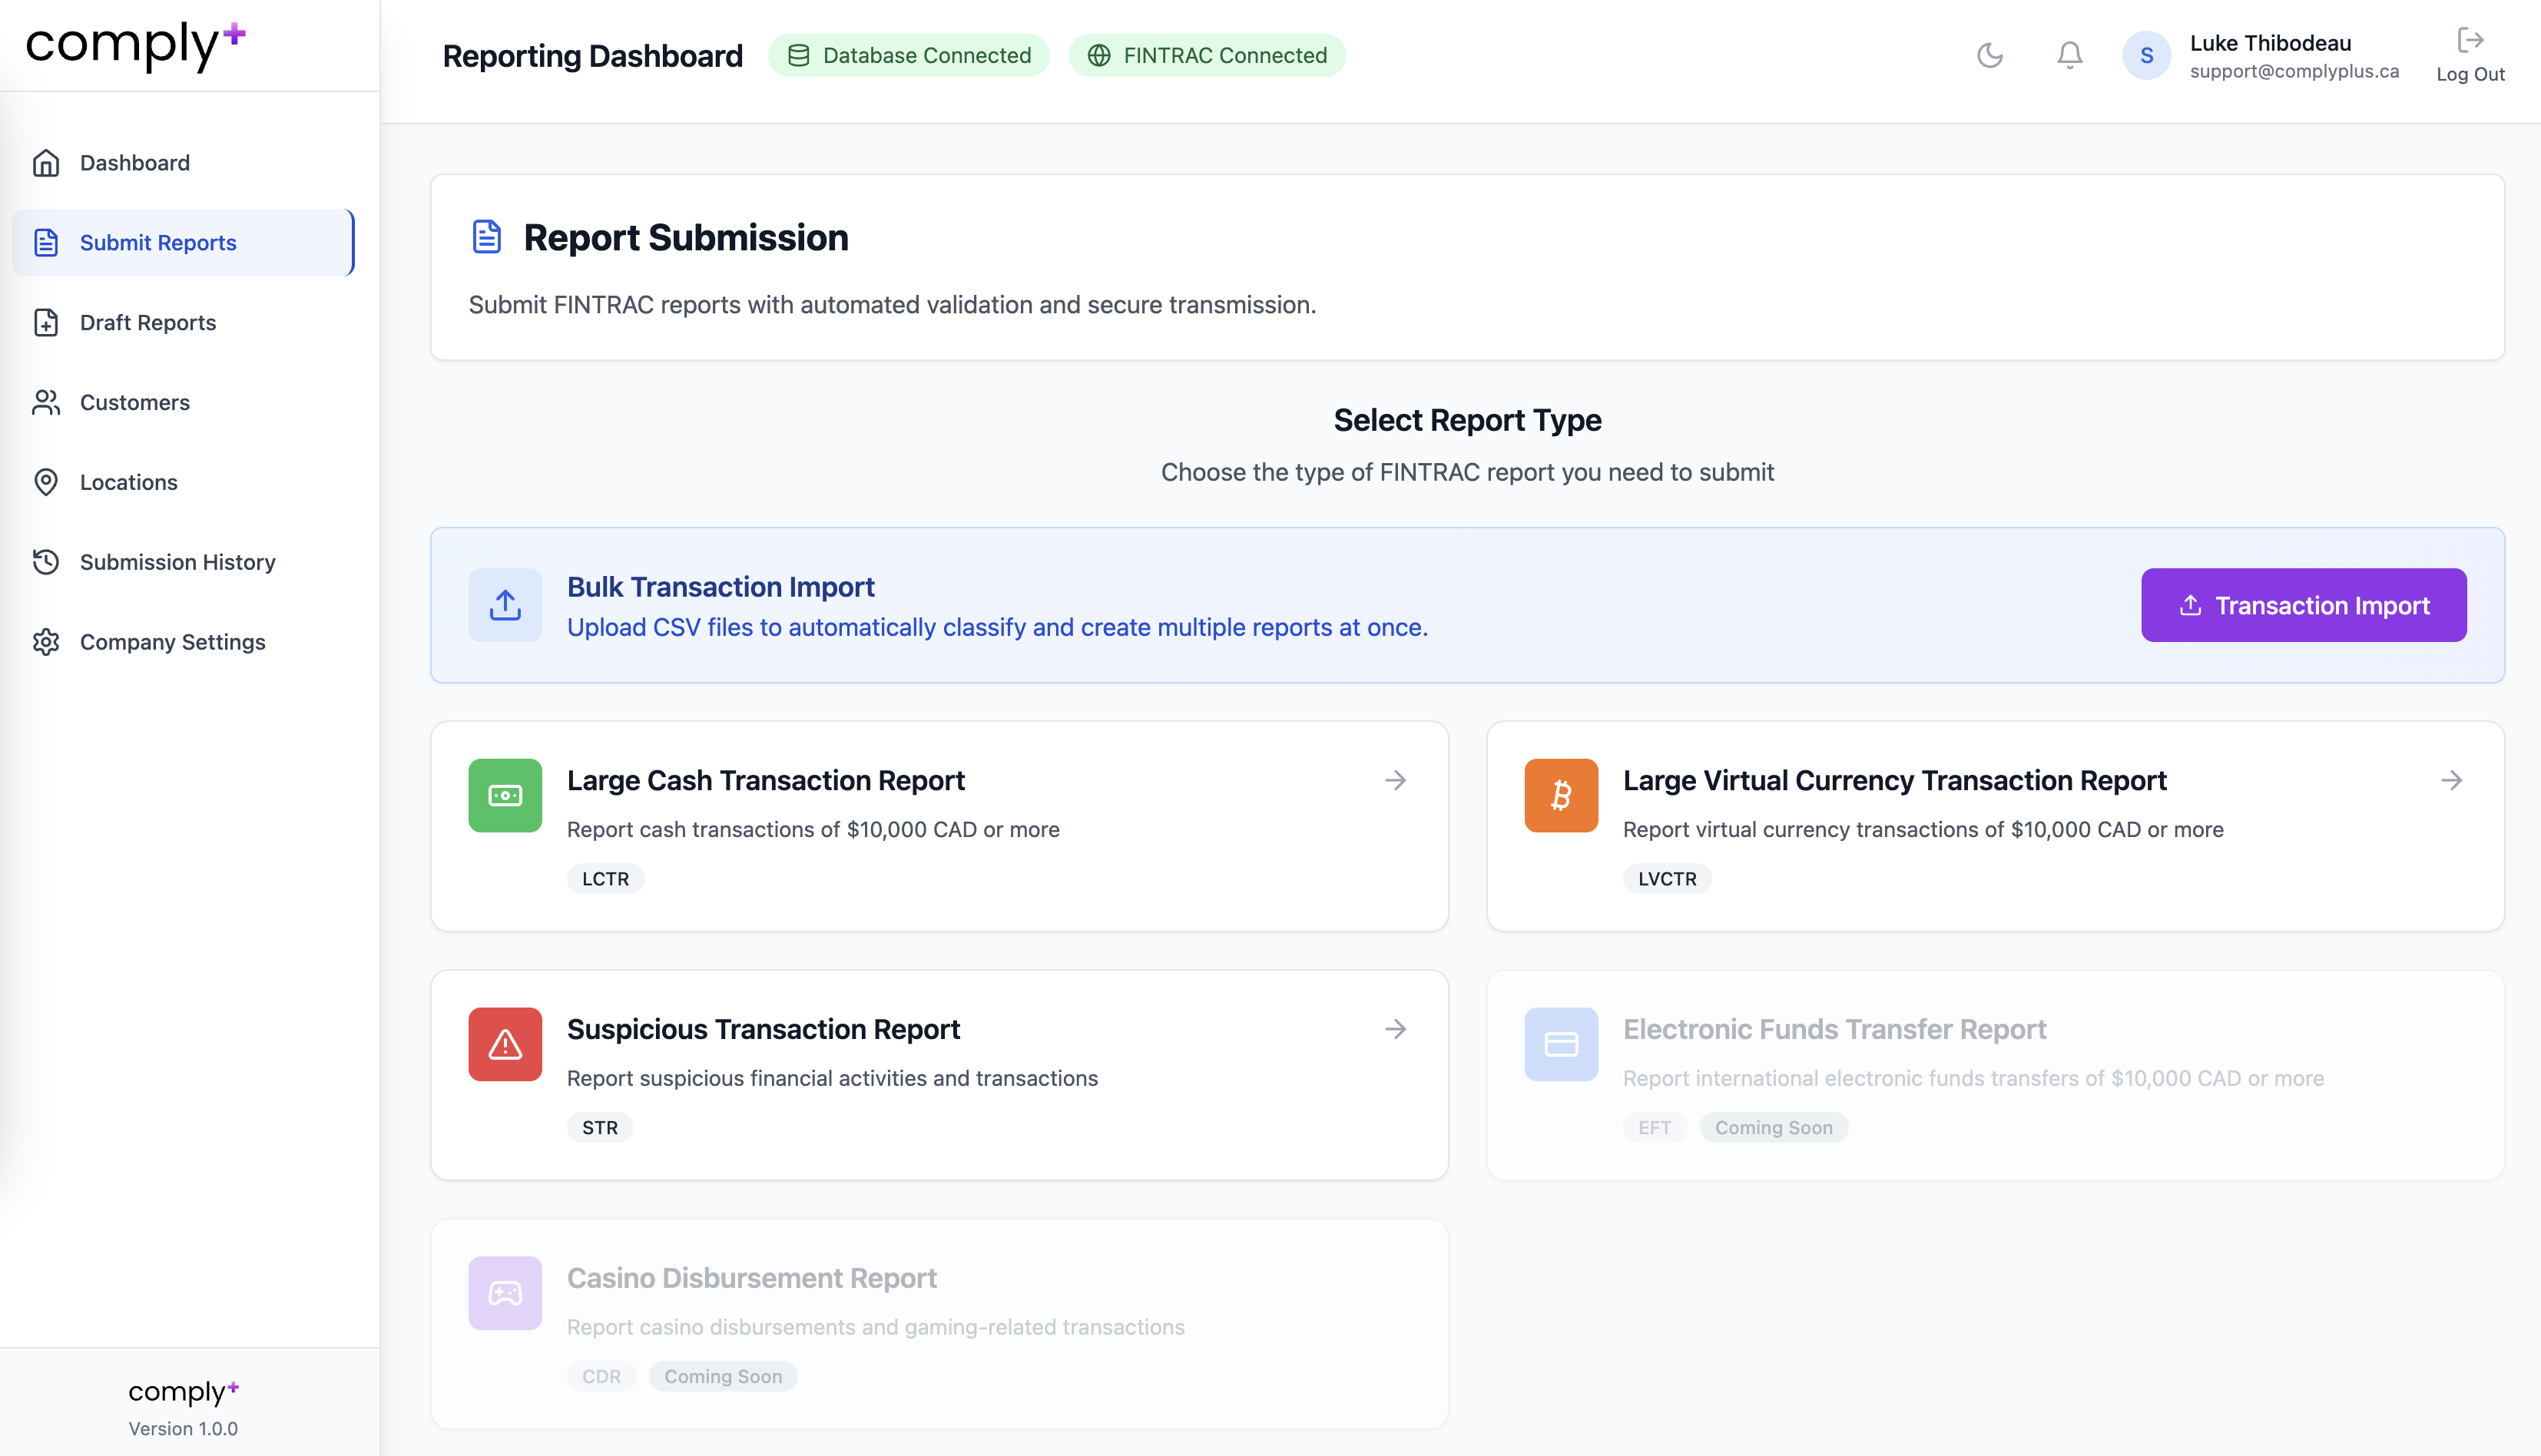
Figure 5: Submit Reports
Bulk Transaction Import (CSV) + Enterprise Alternative
CSV Flow:
- Download the Demo CSV Template (mock data) or your own template.
- Fill transactions (reference customers by Customer ID or Phone Number).
- Upload the CSV.
- Map columns from your file to Comply+ fields (e.g., your "AMOUNT OF TX" → Fiat Amount).
- Click Apply Mapping & Continue. Comply+ analyzes transactions and builds required reports, aggregating within your static 24-hour window (set in Company Settings).
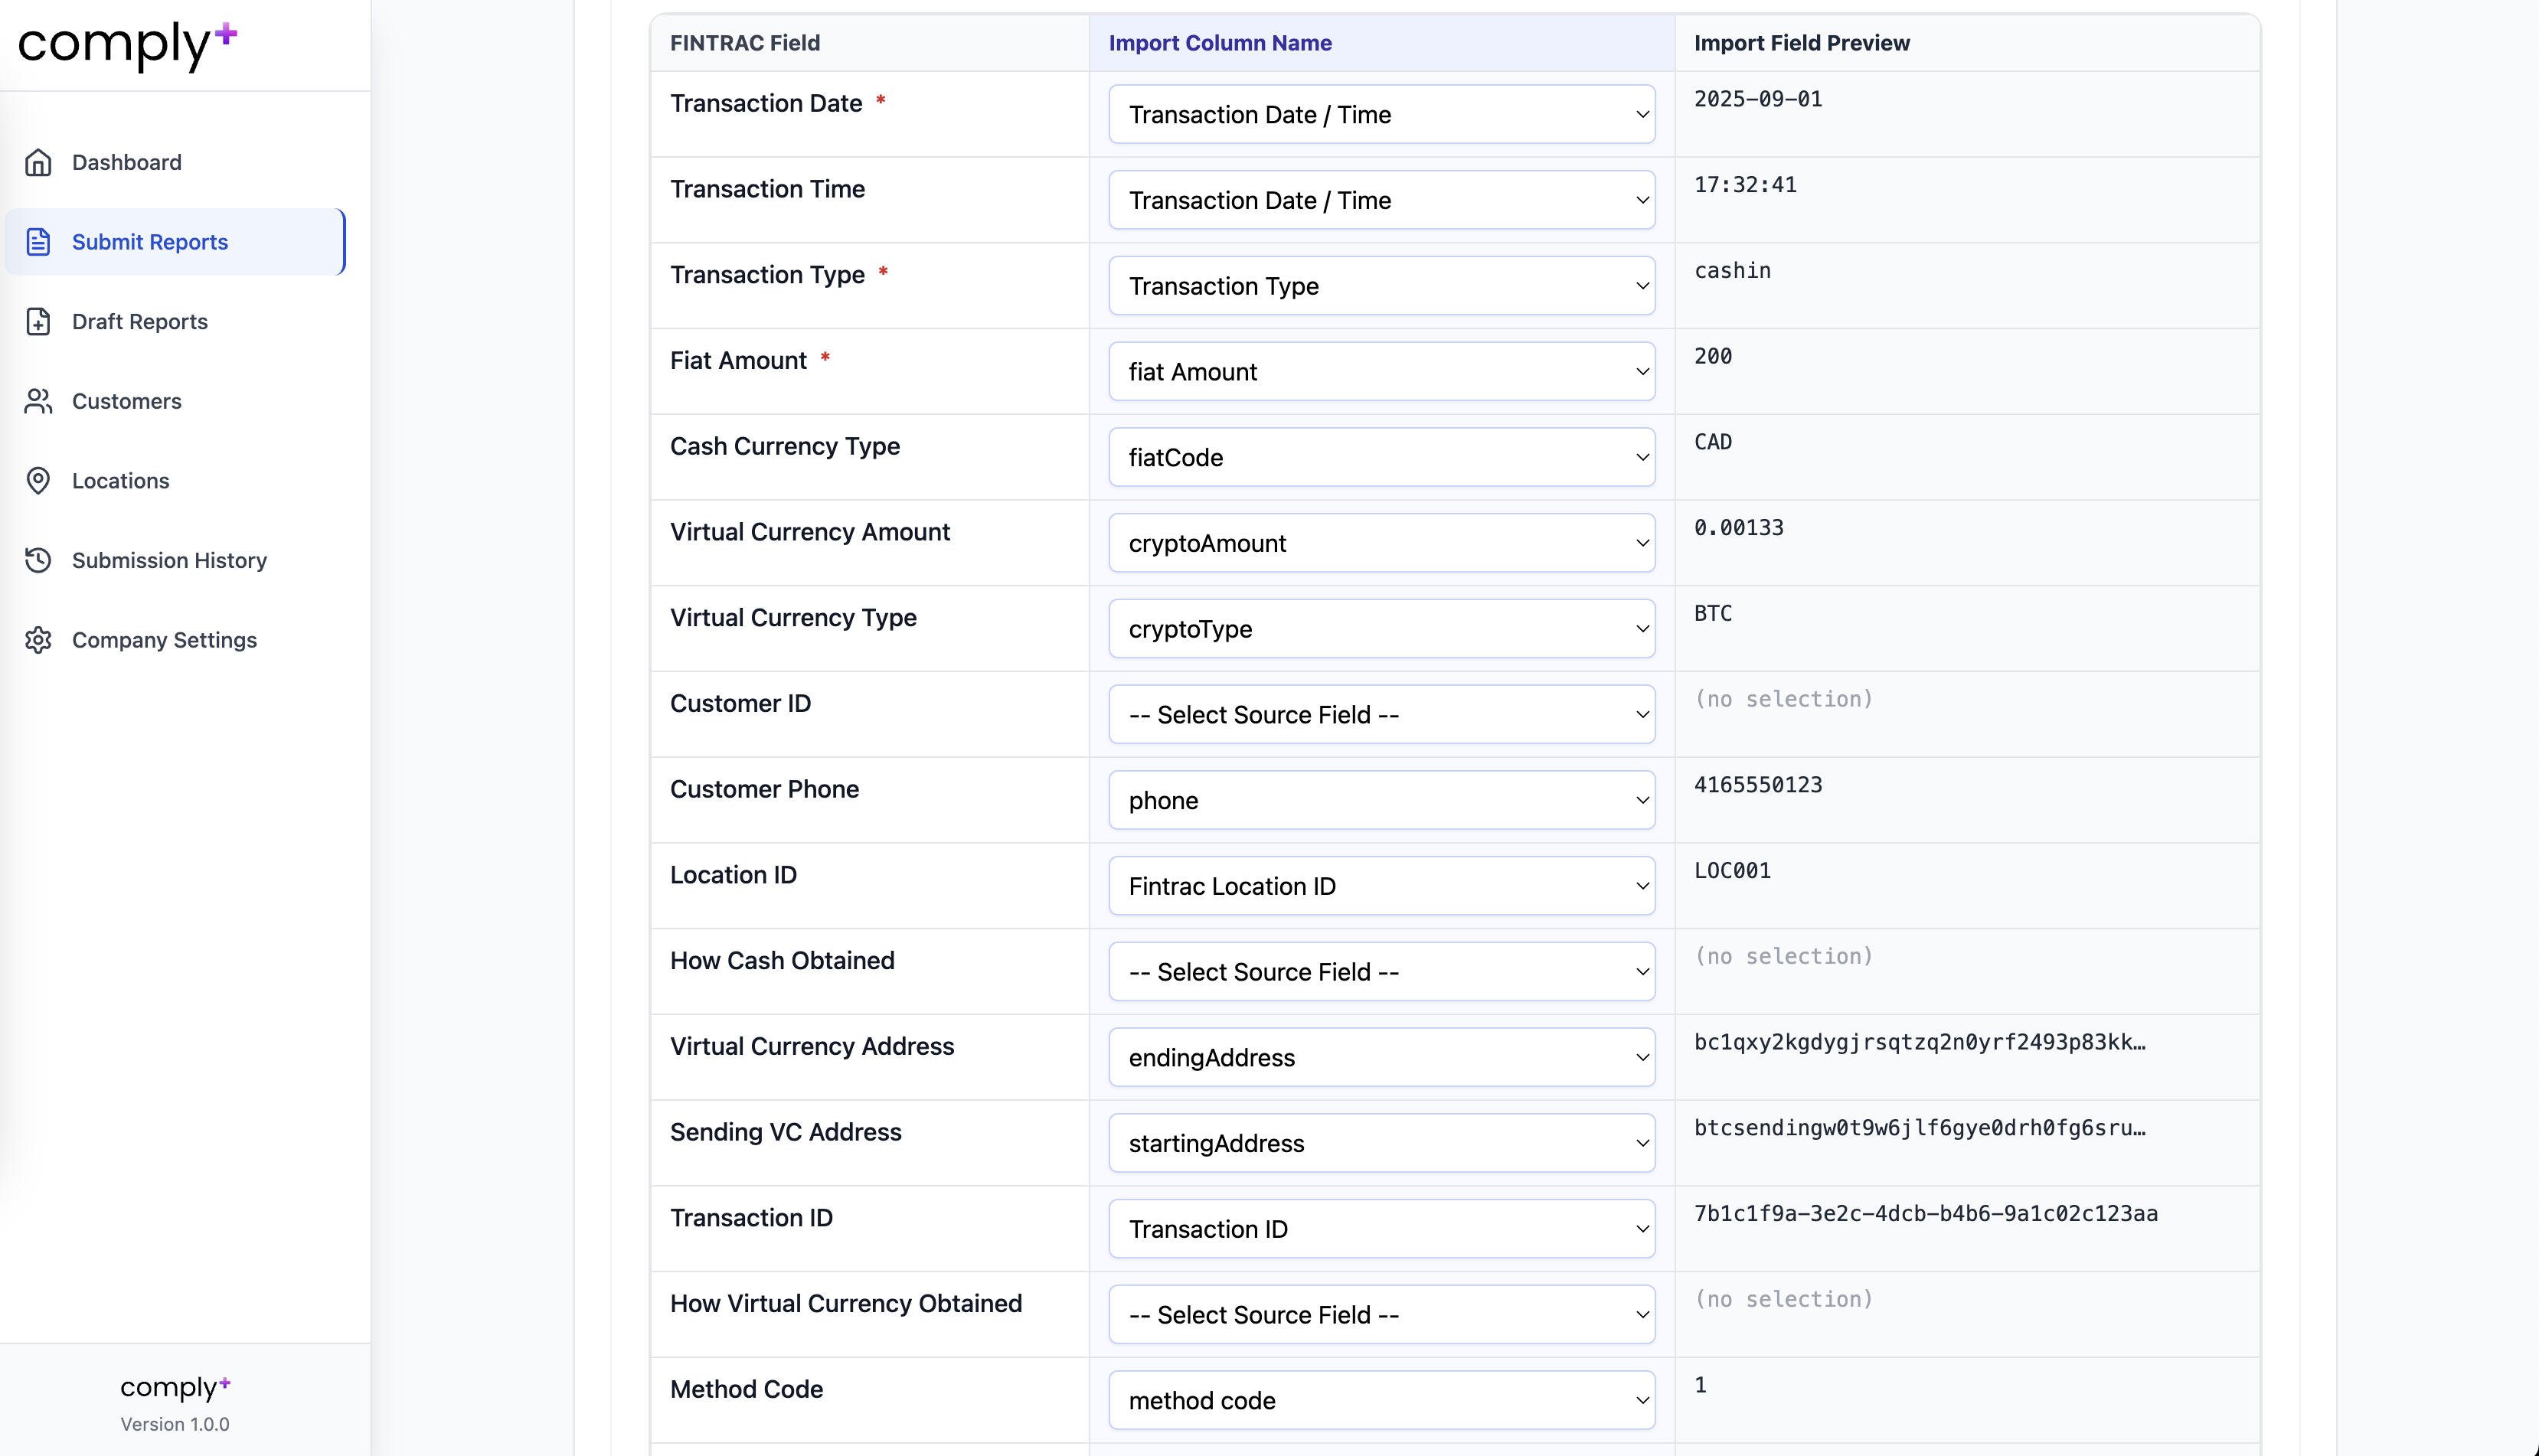
Figure 6: CSV Upload & Column Mapping
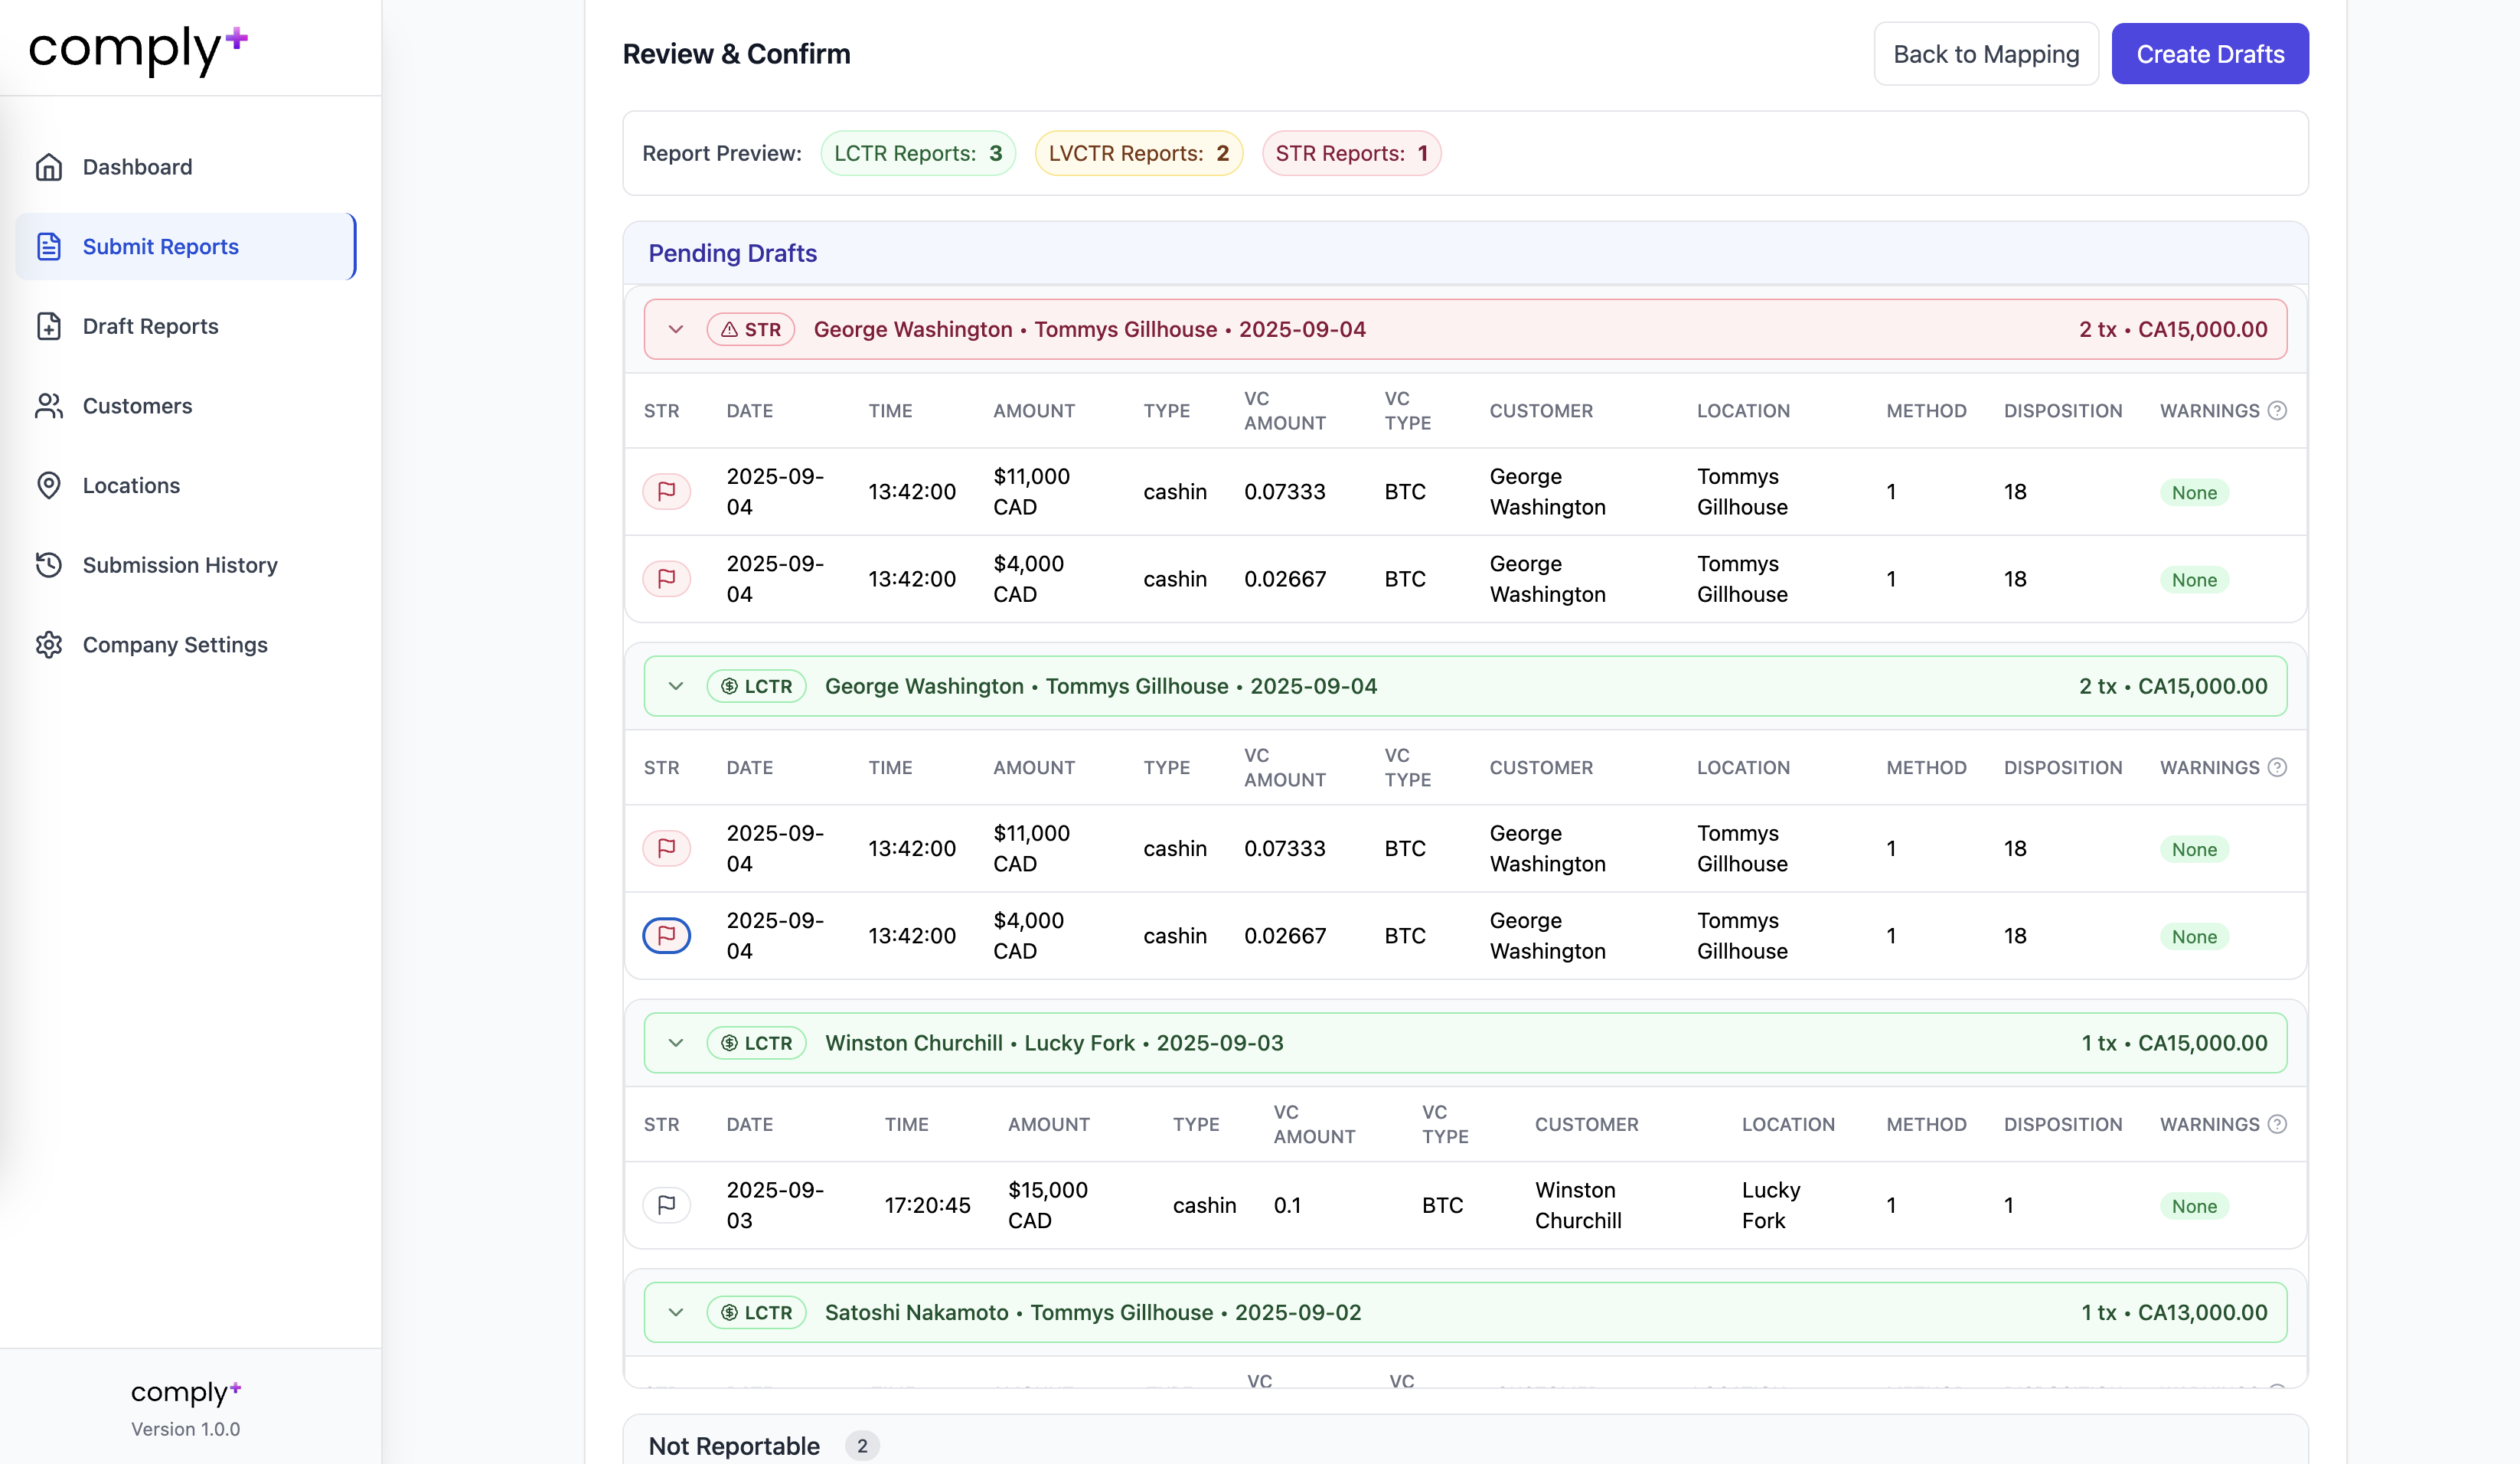
Figure 7: Bulk Import & Report Preview
Enterprise Alternative (no CSVs):
On the Enterprise plan, Comply+ can integrate directly with your user database (transactions and customers) for automatic, hands-off submissions of LCTR/LVCTR and EFTR.
Contact support@complyplus.ca for details and implementation.
Method & Disposition Codes for Bulk Upload CSV
When preparing your bulk upload CSV file, you need to include the correct Method Code and Disposition Code for each transaction. These codes differ depending on the report type (LCTR, LVCTR, STR, EFTR, CDR).
Use the expandable sections below to find the correct codes for each report type:
Draft Reports & Adding STRs
From the preview panel, flag any transaction as STR to generate a separate STR draft.
Open Draft Reports to complete missing fields if applicable (e.g., customer or transaction details).
Within an existing draft, select "Add STR" to include STR-specific fields (e.g., Description of Suspicious Activity and Actions Taken) and have an STR filed along-side an existing LCTR/LVCTR or EFTR.
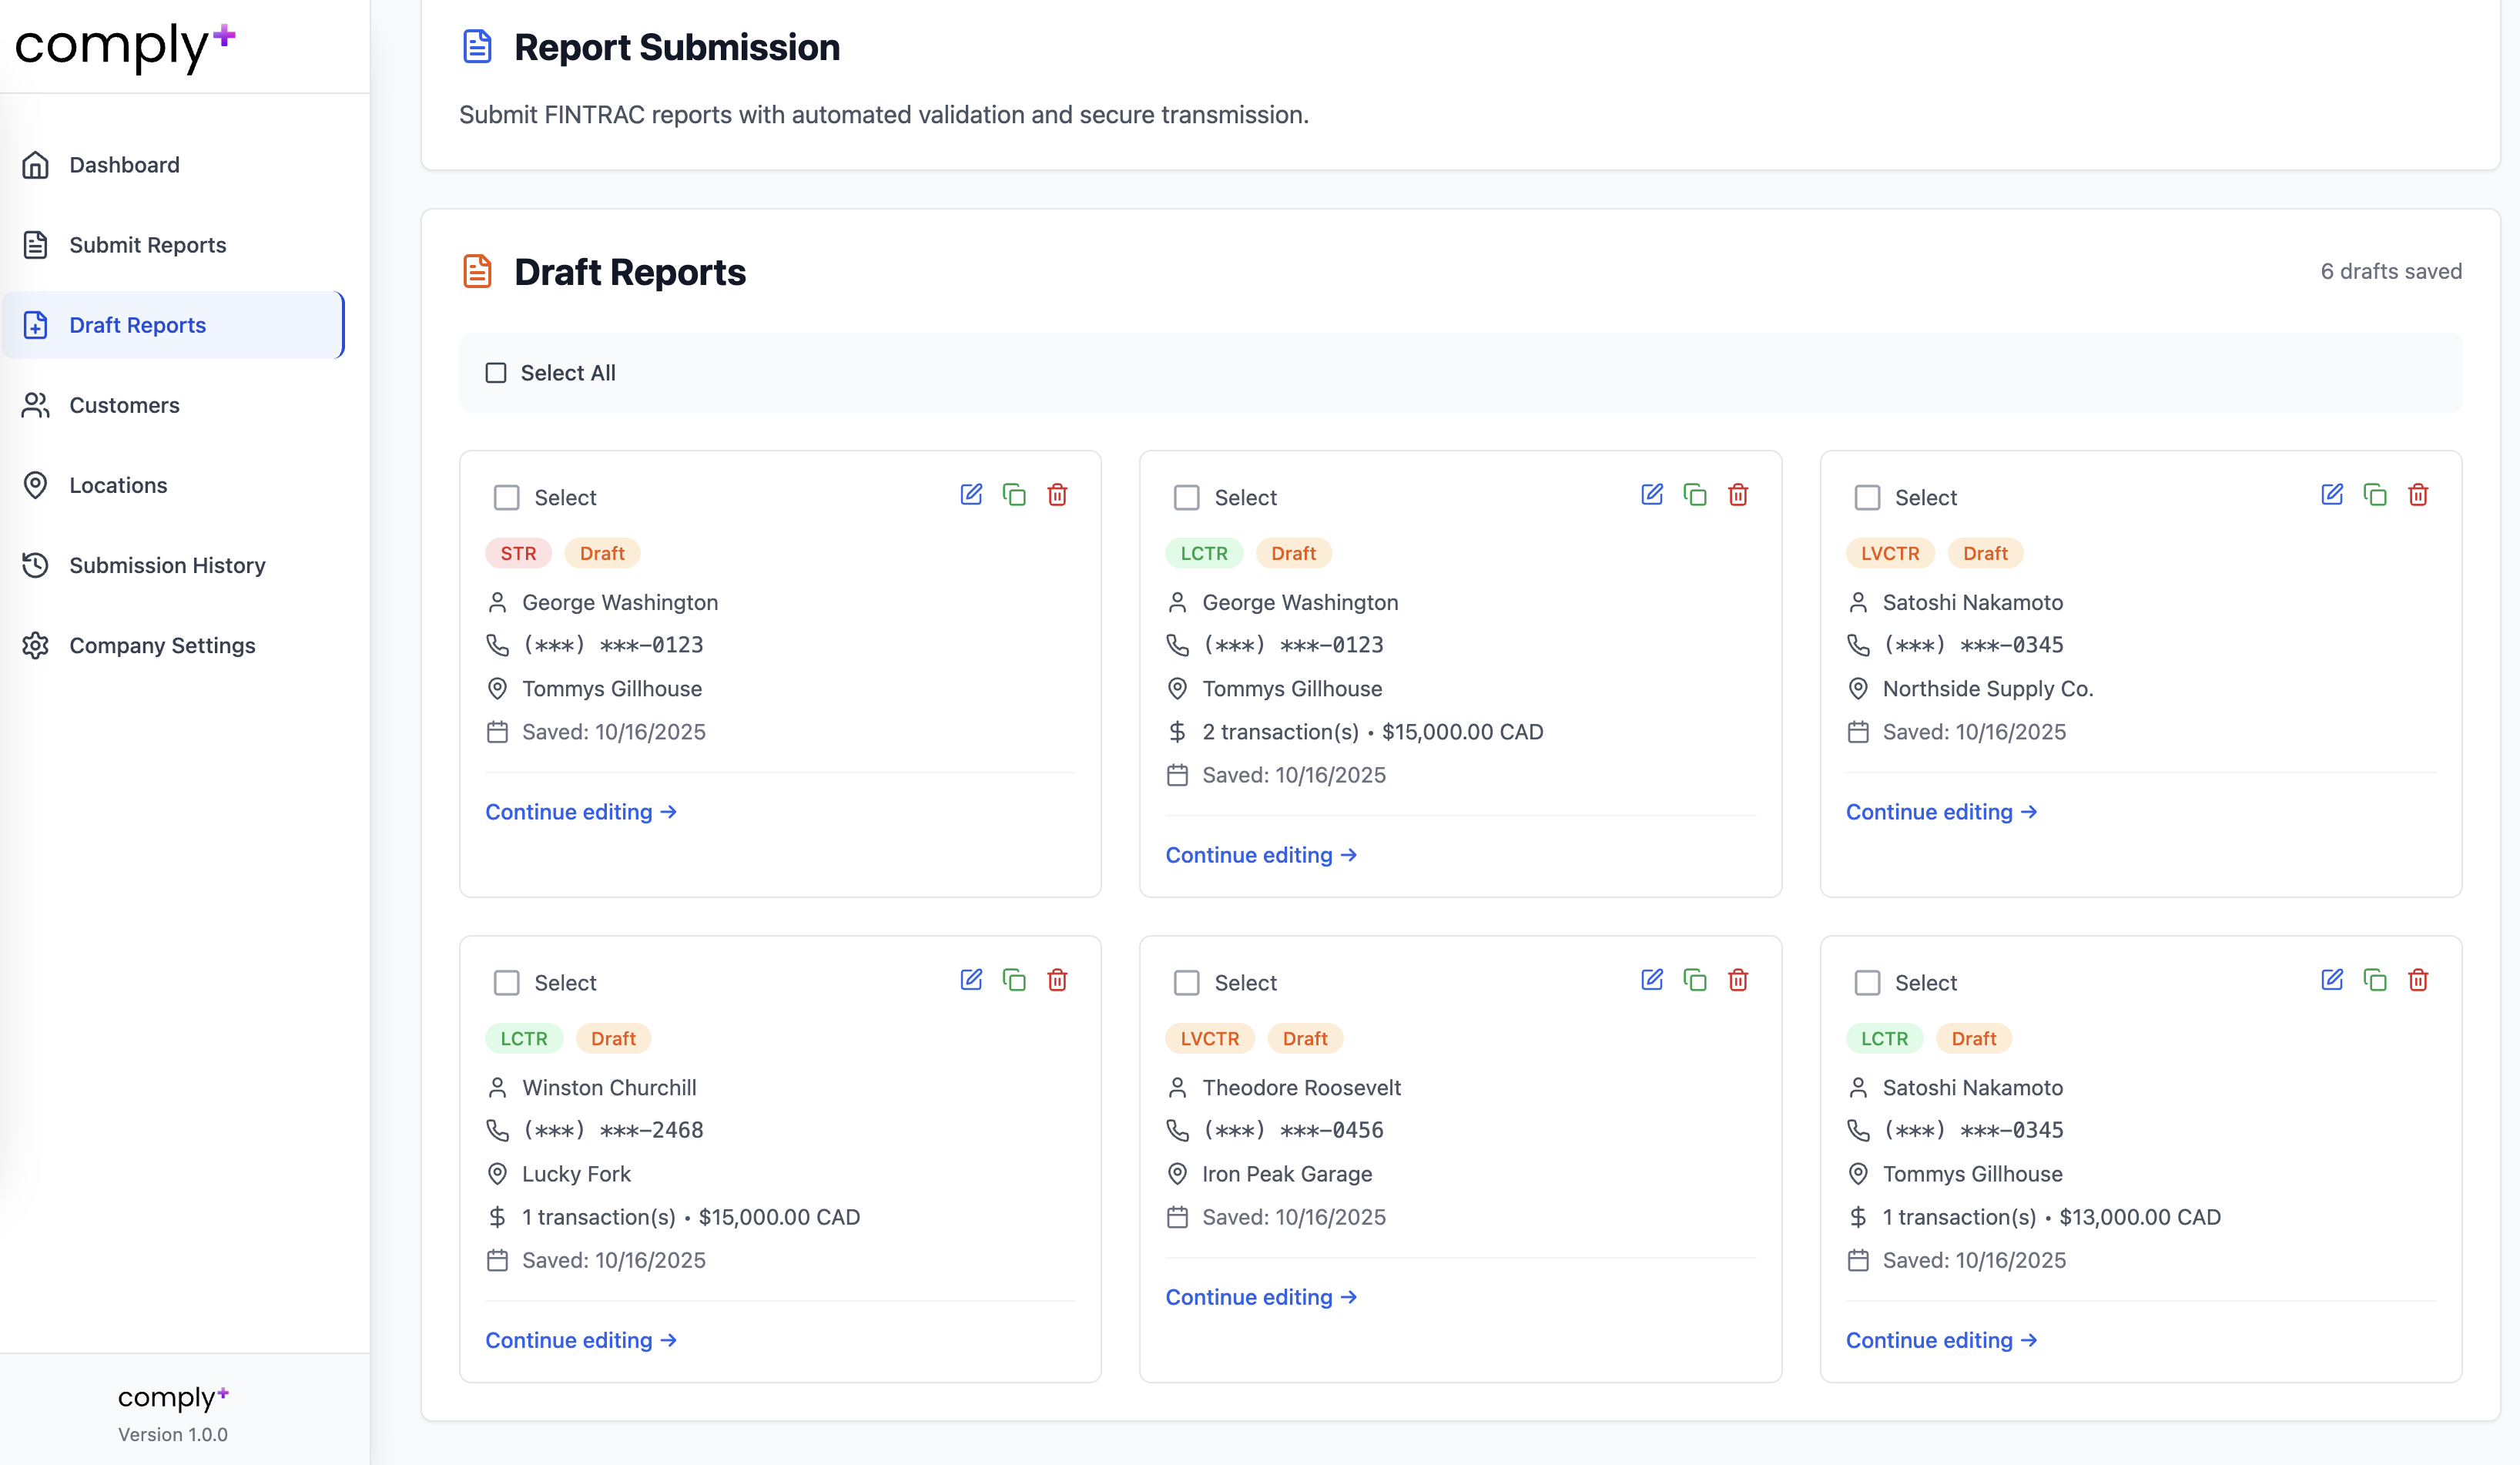
Figure 8: Draft Reports
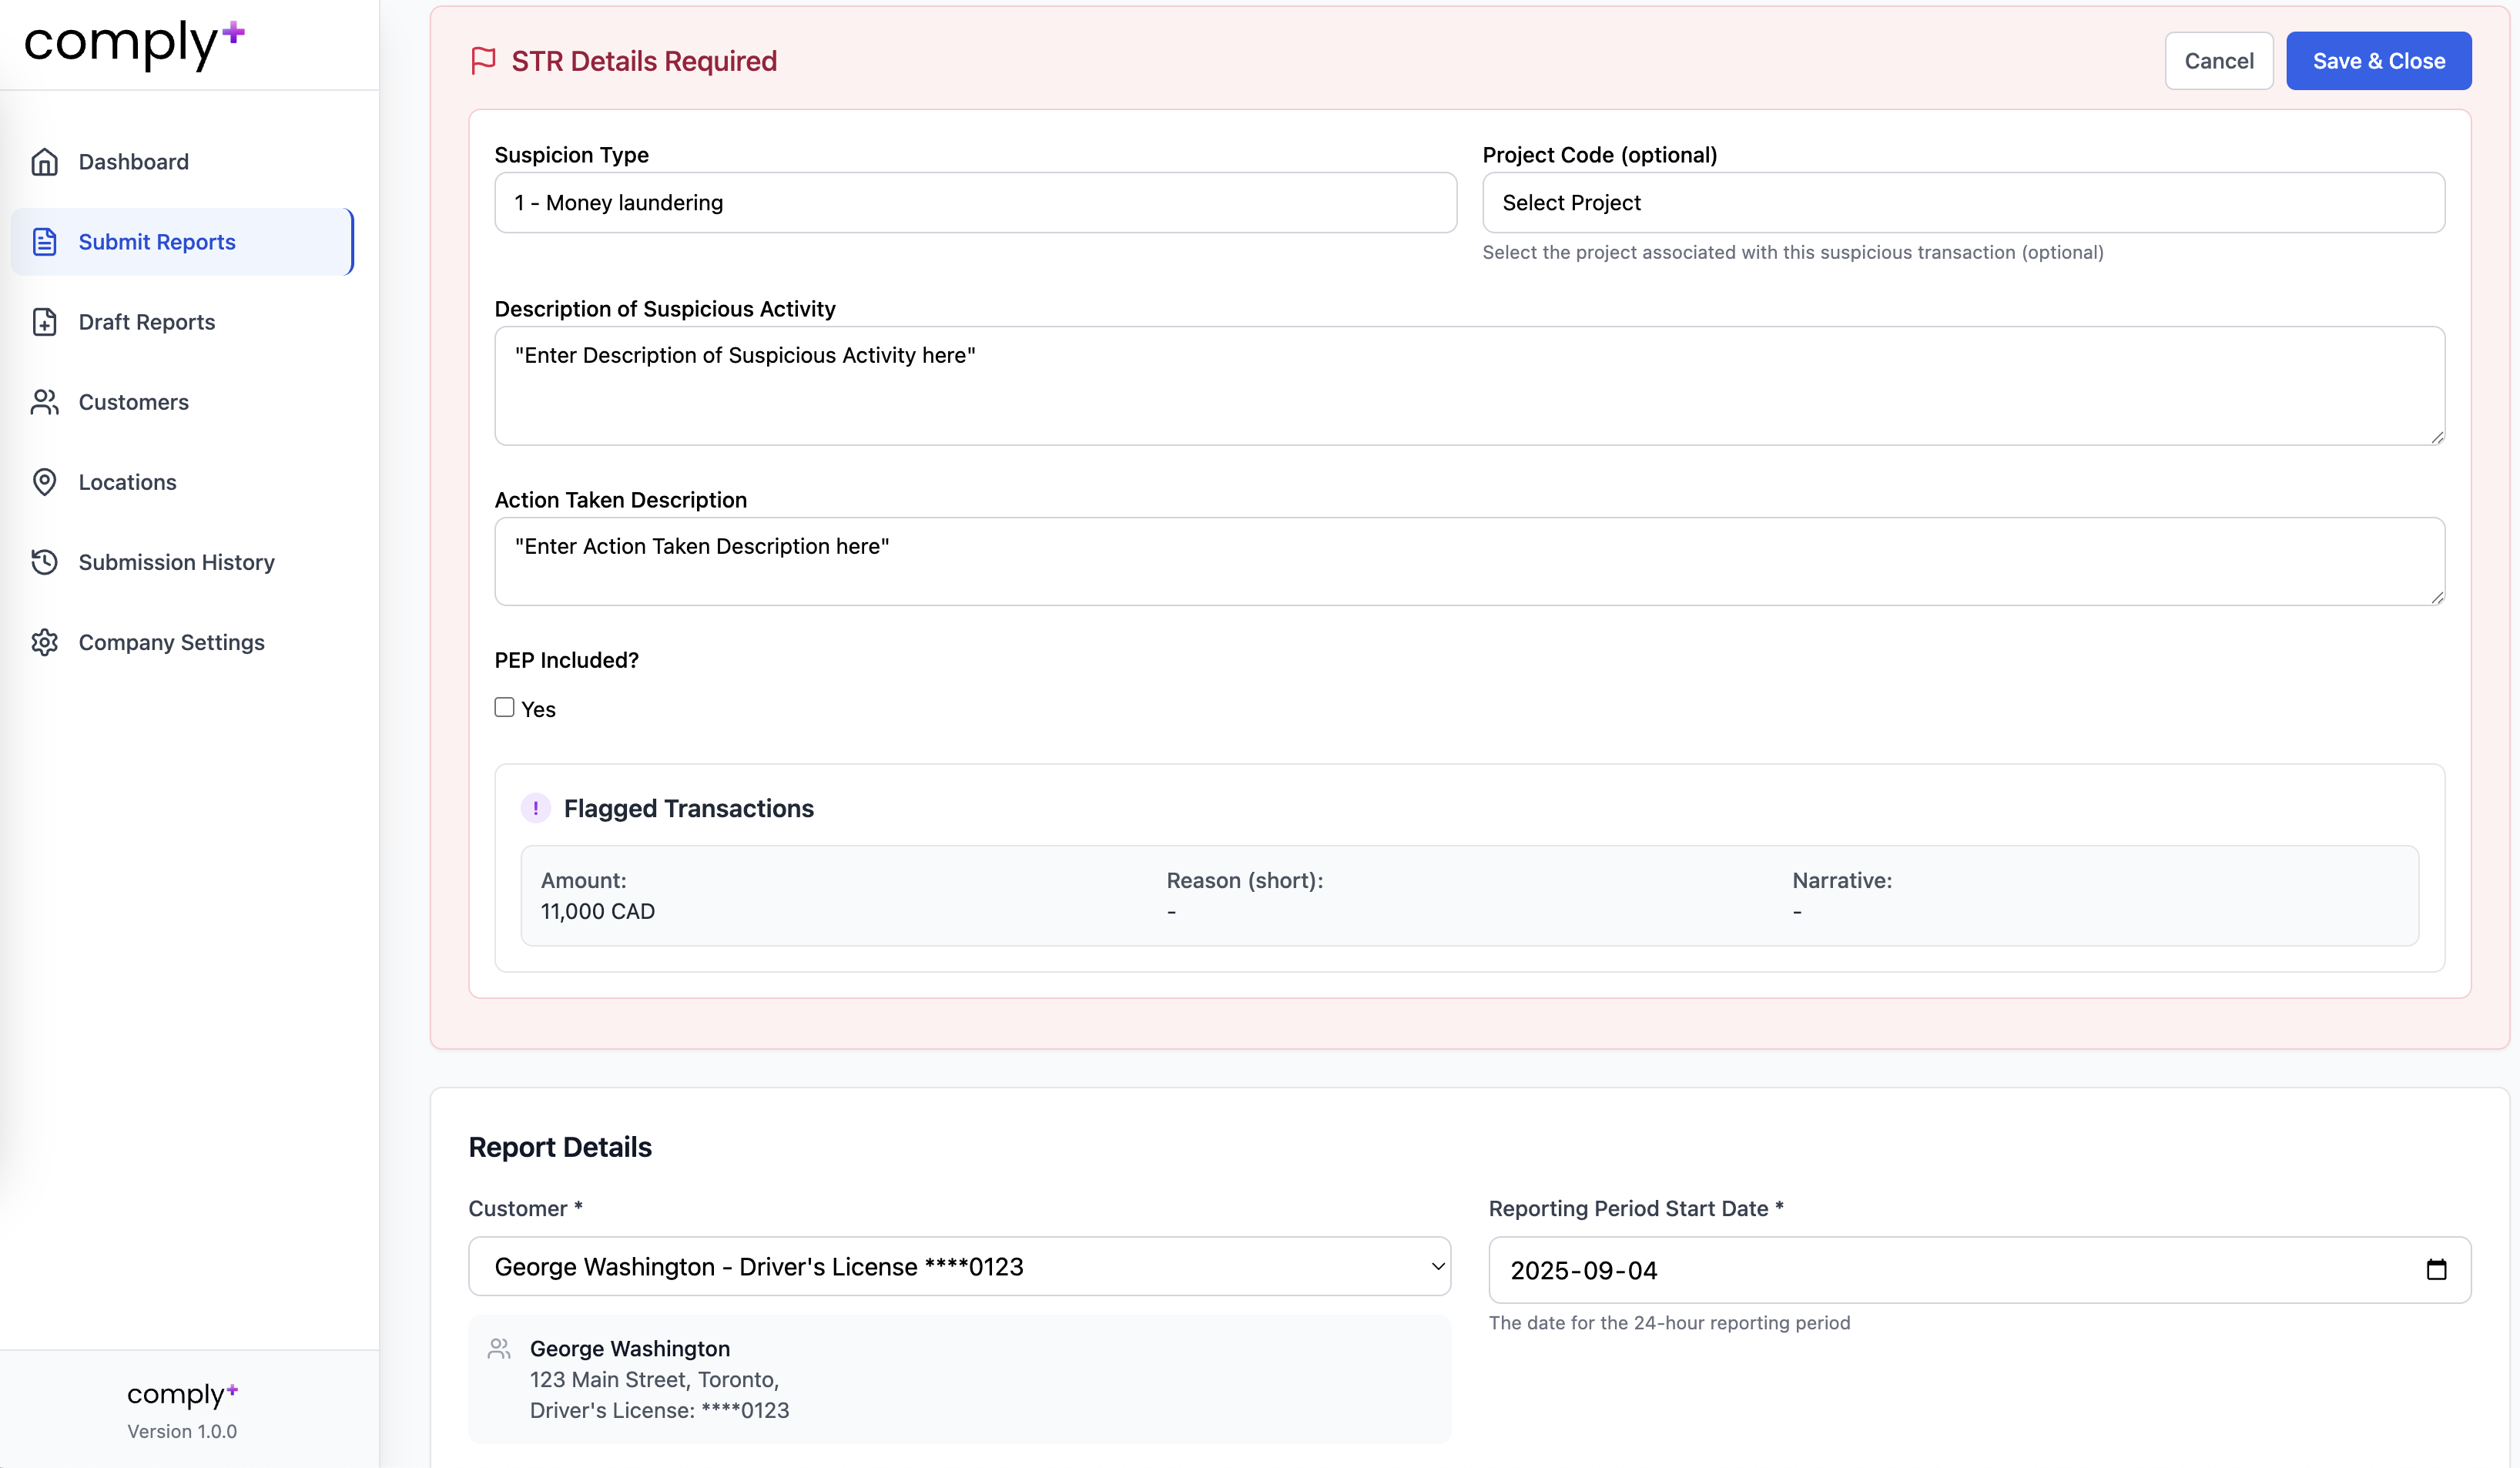
Figure 9: Adding STR to Existing Reports
Submission History
Production (TEST): Status is pulled from FINTRAC's TEST API; Confirmed in FINTRAC (TEST) indicates successful receipt in TEST FWR.
Production (LIVE): Status is pulled from FINTRAC's PRODUCTION API; Confirmed in FINTRAC indicates successful receipt in PRODUCTION FWR.
Demo: Test submissions viewable, but nothing is transmitted to FINTRAC, and this data is regularly purged.
Report Details: Full report details and data are only available for reports submitted through Comply+. Reports filed directly in FWR or through other systems will appear in the submission history but without detailed information, as we don't have access to that data in our system.
Action: Export/download submitted data for reports filed through Comply+.
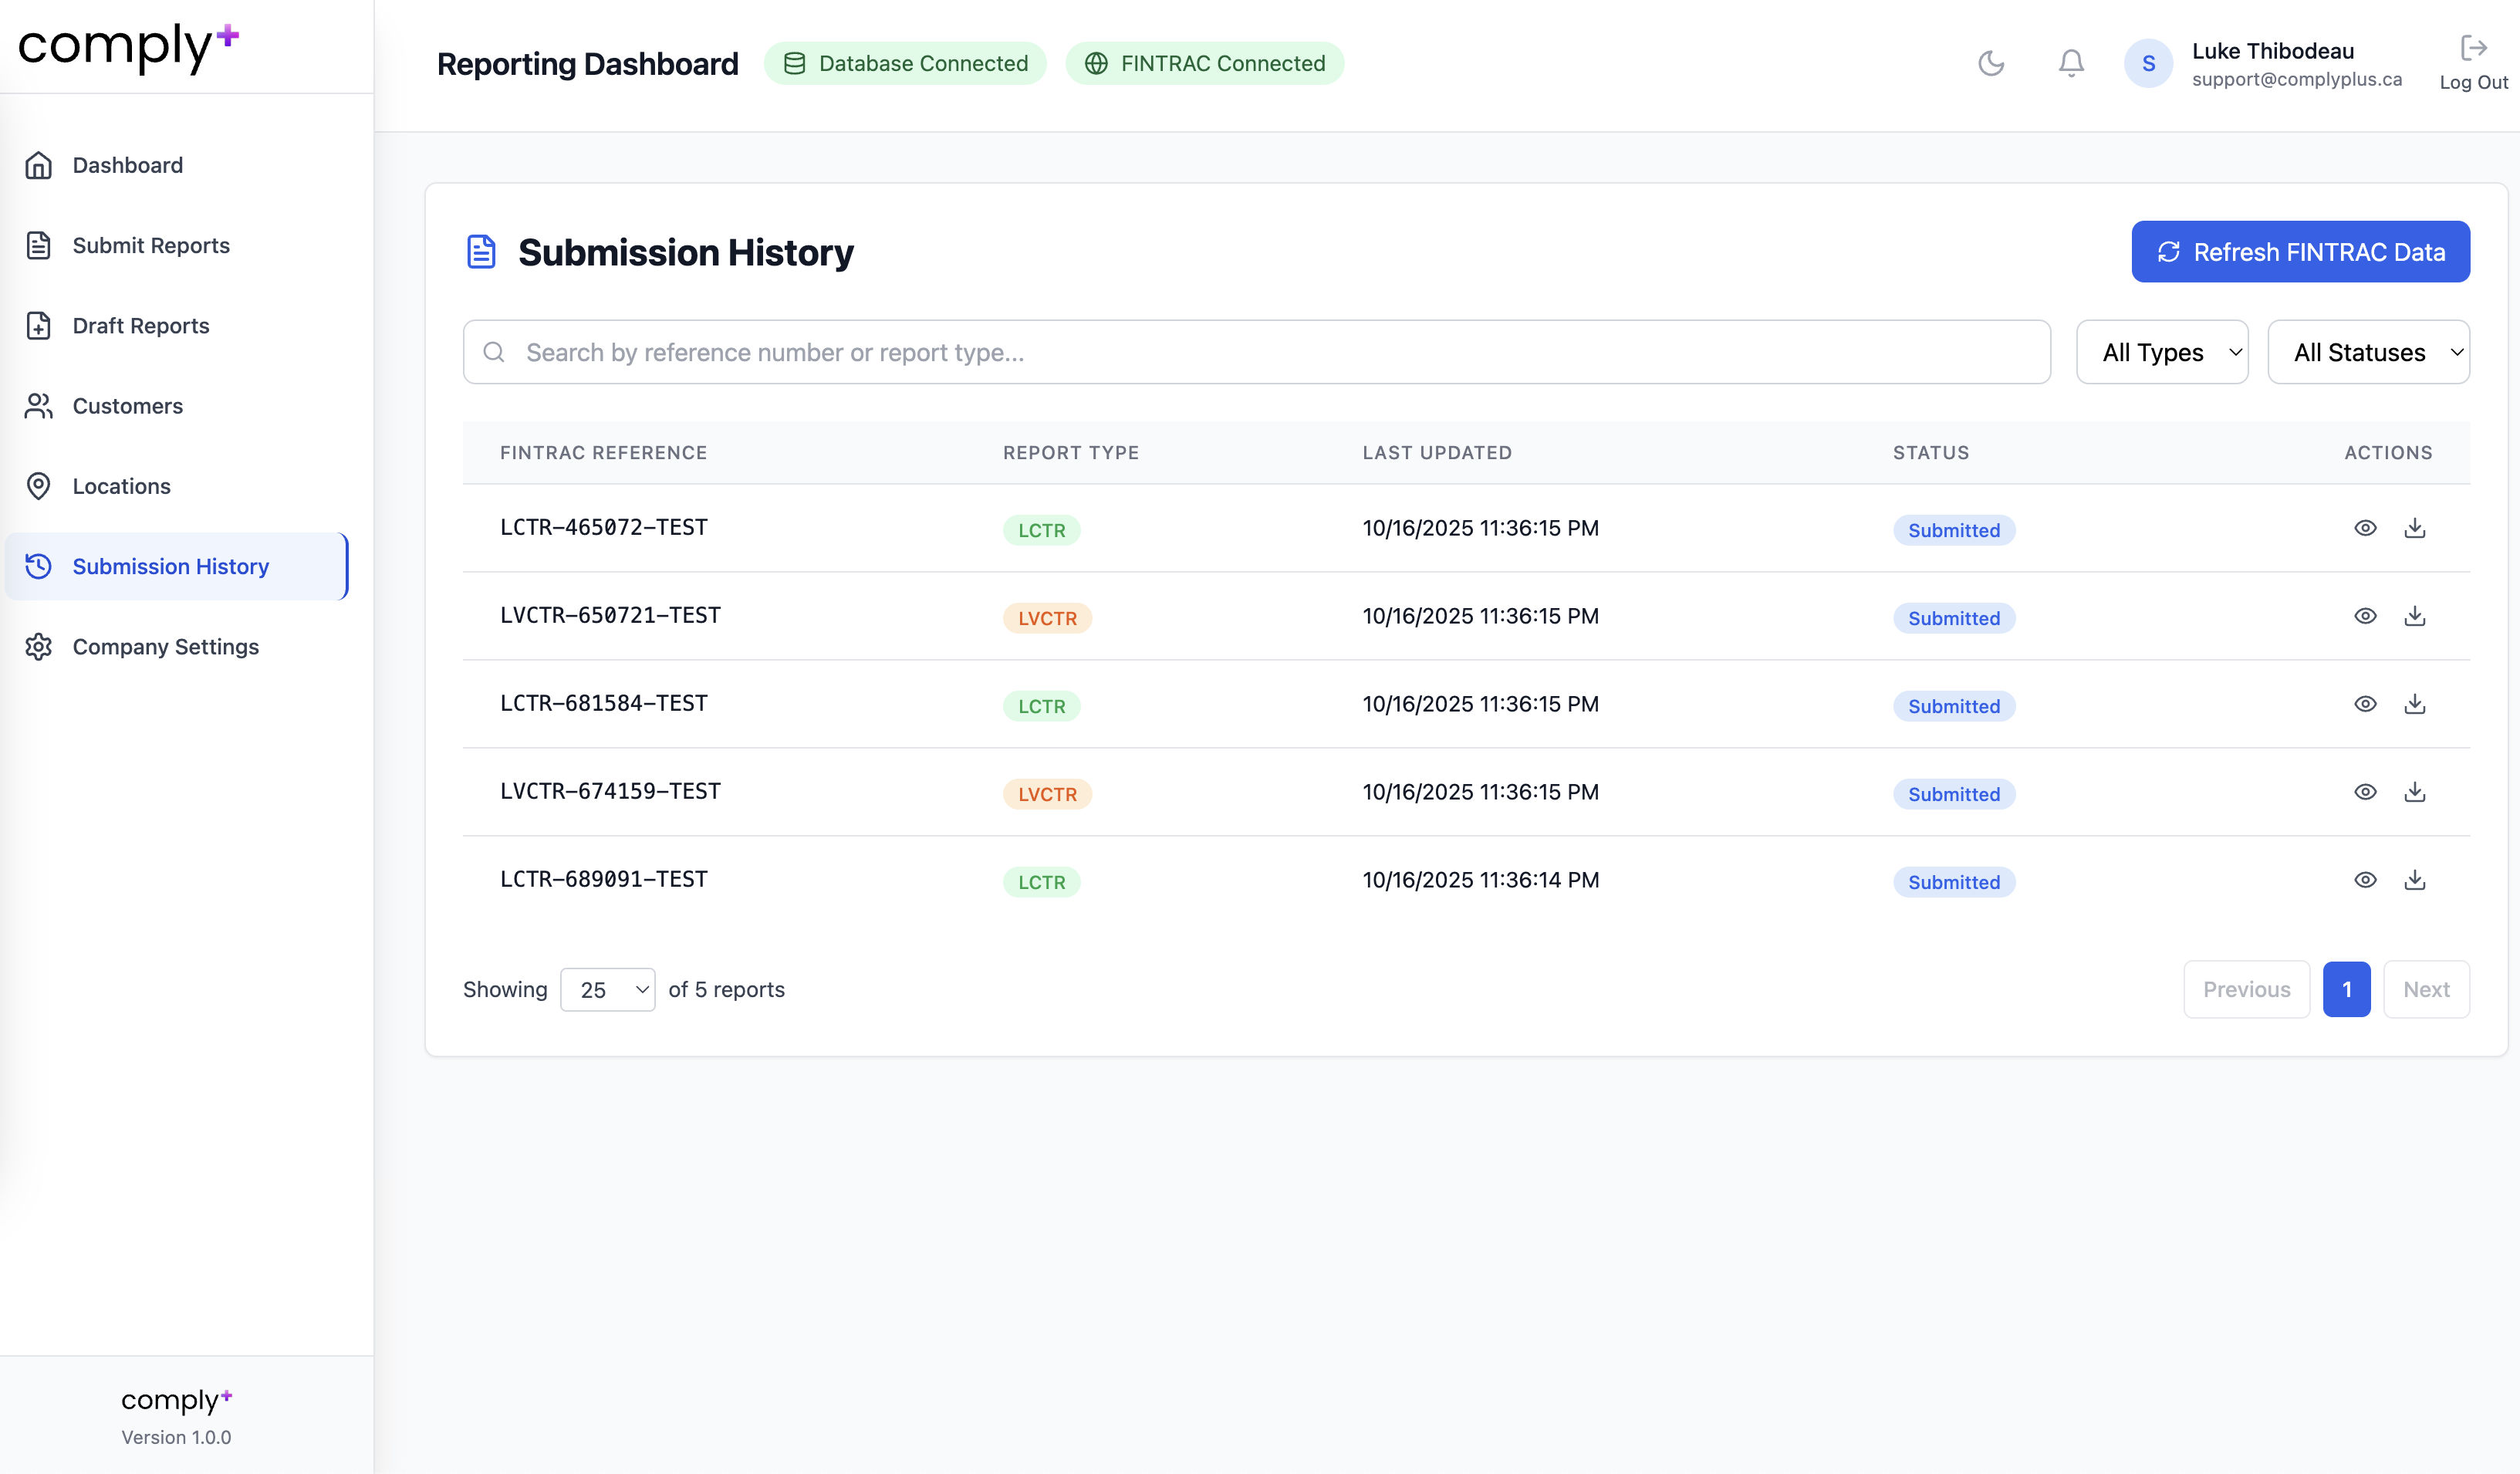
Figure 10: Submission History
Coming Soon: aiSTR
aiSTR will analyze transactions, automatically flag potential STRs, assign a risk score, and—if you choose to file—auto-generate the STR narrative for your review and submission.
FAQ & Common Errors
Location ID rejected
Ensure it exactly matches the FWR Location ID.
Customer not found during import
Add the customer in Customers (ID or phone) or enable a KYC integration.
Submission blocked
Confirm your TEST vs PRODUCTION API credentials in Company Settings in the correct corresponding field (Demo never sends to FINTRAC).
24-hour aggregation not applied correctly
Confirm the static 24-hour window in Company Settings before import aligns with your transaction data.
API key management
Comply+ will notify you 30 days before key expiry.
Get Started
Ready to streamline your FINTRAC reporting?
Questions? Email support@complyplus.ca